Spinning overview

It seems like forever since I did the last post here, sorry.

Here are some photos I took today, showing much of the spinning progress I did last year (and this year). All yarns were made out of approx. 25 grams of (undyed) fiber, spun on the same spindle and spun as thin as I could (too thin was when the thread broke). The yarns are 2 ply and all had a bath in warm water at the end.

First different breeds of sheep:
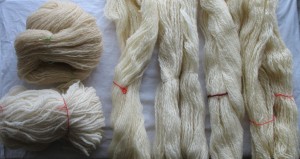
six different samples of handspun wool yarns.

left column top: Coburger Fuchsschaf, a breed from Bavaria with reddish-blonde hair
left bottom: Merino (I think it’s Australian)
The other columns from left to right:
Eiderwolle (wool from sheep living in Northern Germany, grazing on the dikes)
New Zealand wool
Falkland wool
BFL (Bluefaced Leicester, it’s called “white” BFL)

Even though all these fibers are somehow white(-ish), except for the Coburger sheep, the yarns aren’t really white, but their colors are somewhere between white and ivory. For me this is fascinating and one of the reasons why I love spinning undyed wool from different sheep.

Next up some “luxury fibers”:

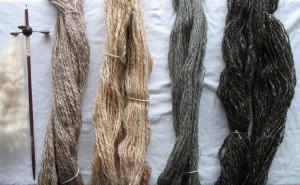
samples of handspun yarn, not only sheep wool

From left to right:
Cashmere (still in progress, therefore you get the spindle with a bit of single yarn on it)
Merino/Alpaca/Mulberry silk/Baby camel (a blend of I think even portions of all fibers)
Baby camel/Merino (a blend, I think even parts of both fibers)
Alpaca (combed, dark grey)
Shetland wool/Tussah silk (a blend of I think even parts of both fibers)

Everything with Camel fibers in it took on a brown-ish color. I have to admit I love the caramel color of the Camel/Merino mix, and the fibers looked even more like coffee with much milk.

After all the white-ish sheep it was fun to get the black shetland wool mixed with the silk.

(if it wasn’t clear: the photos are cropped, in real life the skeins of yarn have only two ends.
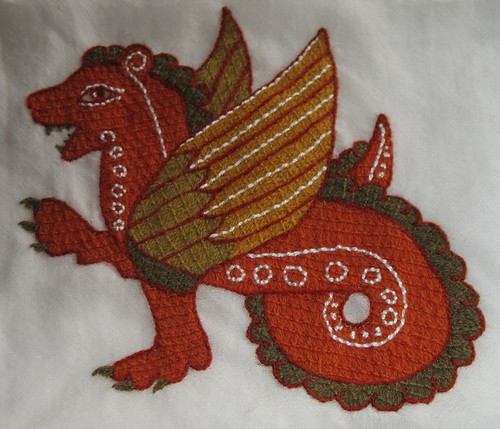
Look at my sweet little dragon!

It finally got the teeth and claws on November 18.
dragon finally finished

Shortly after the last post I filled in the white outline, and thought I was done.
On November 10 I showed the dragon to a friend and about on the same day I looked at Tanya’s dragon and saw that I still lacked the claws and teeth. My friend suggested the dark green for claws and teeth, instead of the beige color that I was pondering.
After I stitched them I saw that she was right and the claws and teeth fit the dragon color scheme.

I had to “cheat” a bit on the white outlines.
All colors are stitched in quite thin wool thread, the read outlines are in split stitch.

The white thread is cotton embroidery thread which is at least double thickness compared to the wool thread, so I used a kind of double running stitch to achieve a similar look but without the lines getting too wide.

I don’t know when I’ll do the leopard, but I will do him and then assemble everything to a wonderful pouch.

I can see the light!

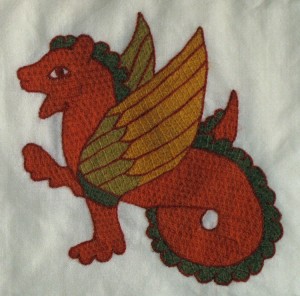
…at the end of the tunnel. 🙂 My dragon finally has outlines in all the right places.
outline-complete

I like the red outline, even though it’s really subtle on the orange body.

Now what shall I do next? Take the white embroidery thread and finish him? Or take up a neglected spinning project? Or maybe I’ll dive in my fiber stash to sew my daughter a pullover, which she could well use in the current colder weather.

I know I said lavender…

but you won’t see any lavender colored thread in my current progress.
Dragon with outline
I had just one meter of the handspun bright lavender thread which was only enough to stitch the outline along the head and down to the chest. I looked through my whole yarn and embroidery stash but couldn’t find more of it.

Then I tried the veg dyed lavender thread but that turned out to me much more grey-ish than I thought and a grey-ish outline around the body (between body and white background) just doesn’t look good.

So I tried the red veg dyed thread I still had in my box, and I like it. It’s not a big contrast between the orange body and the red outline, but the result looks harmonious and I like my dragon now very much.

I’ve reached a decision!

body-complete

I unpicked the nude wing base and instead used the darkest green for the wing base and the crest. All other colors (wool, veg dyed) I have available would muddle too much with either the orange body or the light green wing parts. I had a shade of green right between the two I was pondering, but I used every inch (or centimeter) of that for another embroidery. Now that the crest is done I’m quite happy with the dark green.

I’ll use the lavender colored slightly thicker wool yarn for the outline, and if that isn’t enough I’ll go digging through my handspun to find the small strand of lavender colored wool mix that I spun and already used for a bit of embroidery.

Now onto the outline and details, Tanya already published the second beastie of the stitchalong.

Dragon decisions… (or: I can’t decide)

I can’t decide how to finish the dragon embroidery. I have three alternatives, but none seem really good. Can you help me, please?
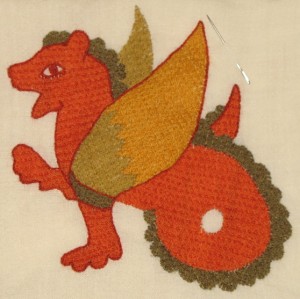
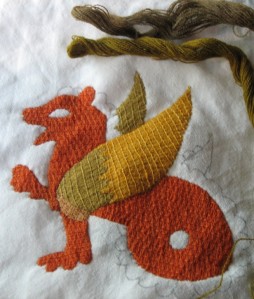
This is the current dragon progress:body
It’s the best I could do with natural light (and you can get to the big version by clicking it).

Do you see the nude-coloured part at the base of the wing? This should be the same colour as the crest on his back. This picture (from another stitchalong participant) shows that nude can go well together with rust/madder red and green, but my wing is light green and yellow and not such a dark green.

I think the nude-coloured thread blends in too much, it doesn’t really stand out against the green wing part.
But I think the same about the lighter green of the two strands/skeins of yarn that I laid on the fabric above the dragon wing. The lighter green skein is only a little bit darker than the green part of the wing.
The darker green skein doesn’t have that problem, it would stand out really well. (but it’s the darkest colour in there if I use it.)
I don’t have any shade of green between those two shown here.

The next question: what do I use for the outline color? Tanya used some shade of purple for her original.
I can either use the dark green (if I don’t use it for the wing base and crest), or the nude-coloured skein (if I don’t finish the crest with it). Apart from that I have a skin-tone skein (color is right between the nude and the orange of the body), a red (that’s a darker shade of the orange of the body) and a little bit of lavender coloured embroidery yarn. But the lavender colored yarn is a bit thicker and probably much less. I don’t mind so much about the thicker yarn but I don’t know if it’s enough.

I hate such decisions, I can find no solution that’s not a compromise of some sorts and I don’t know which is “better”. Can anybody please help me reach a decision?

A dress with no shoes

I’m still stitching along on the dragon and making some good progress, but in the meantime I’ll show you another dress I made and finally got around to take a photo early this summer.

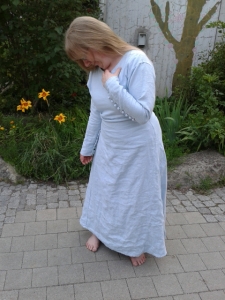
blue dress

This dress is made out of light blue linen fabric after my “standard dress pattern” (which produces suitable dresses for anything until about 1300). The interesting and time-consuming detail here are the buttons. There are about 9 buttons on each sleeve, all handmade out of smaller pieces of the same fabric, accompanied by the same number of buttonholes. The buttonholes don’t look really well done but for my very first try they are acceptable. It’s completely handsewn (as usual for me) and the wrinkles are because I gained some weight since making it.

It’s a really simple dress but I like it very much. It’s light and comfortable, light enough for even the hottest summer day. And somehow this is the first dress that I made that I will voluntarily wear on my way to a historical event even when going there alone by public transport.

It kind of looks like I’m thinking “oops, I’m wearing no shoes” but the truth behind my bare feet is that it was too hot that day to wear anything else than sandals. All shoes that are more closed were too narrow for my feet that day.

The dragon has a head now

This morning I finished stitching the big wing, then I embroidered the other wing. I looked at some pics in the Flickr group for the Stitchalong and saw that there’s a tip of the other wing also showing. So I did that right after the first wing was finished.

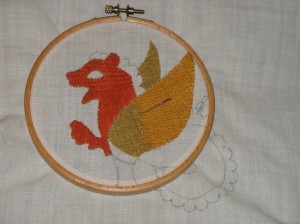
head part 1

Then I couldn’t decide on the color for the base of the wing. Shall I use a green that’s just a bit darker than the green part of the wing or shall I use the dark green with more contrast?

The color on the wing base is the same as the crest on his back so I was wondering which shade of green would look better with the main body color.

In the evening I had a good idea what to do next: the body. After the body is embroidered I can compare both shades of green to the wing and the body and then decide.

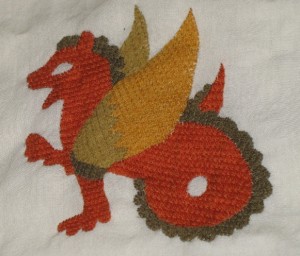
The picture above was done around 11 pm, after I laid the long stitches over the whole body front (head, chest, raised front leg) and started couching down the head.

Dragon’s wing part 1

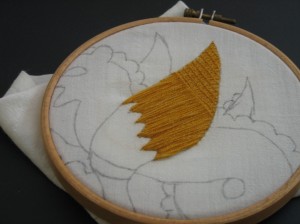
Here’s the first part of the dragon embroidery:

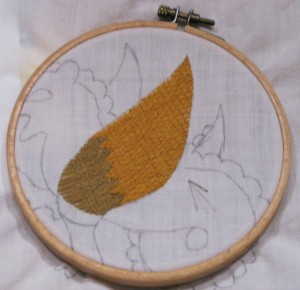
first part of the couched embroidery, the wing is partially completed.

On Sunday I finally got around to starting embroidering the dragon. Here’s the first part of the wing. I took the photo yesterday in the early afternoon while the sun was shining into my living room, but stitched on a bit in the evening.

When I compare my embroidery to Tanya’s photo, it seems like I chose the right thickness/weight of the yarn.